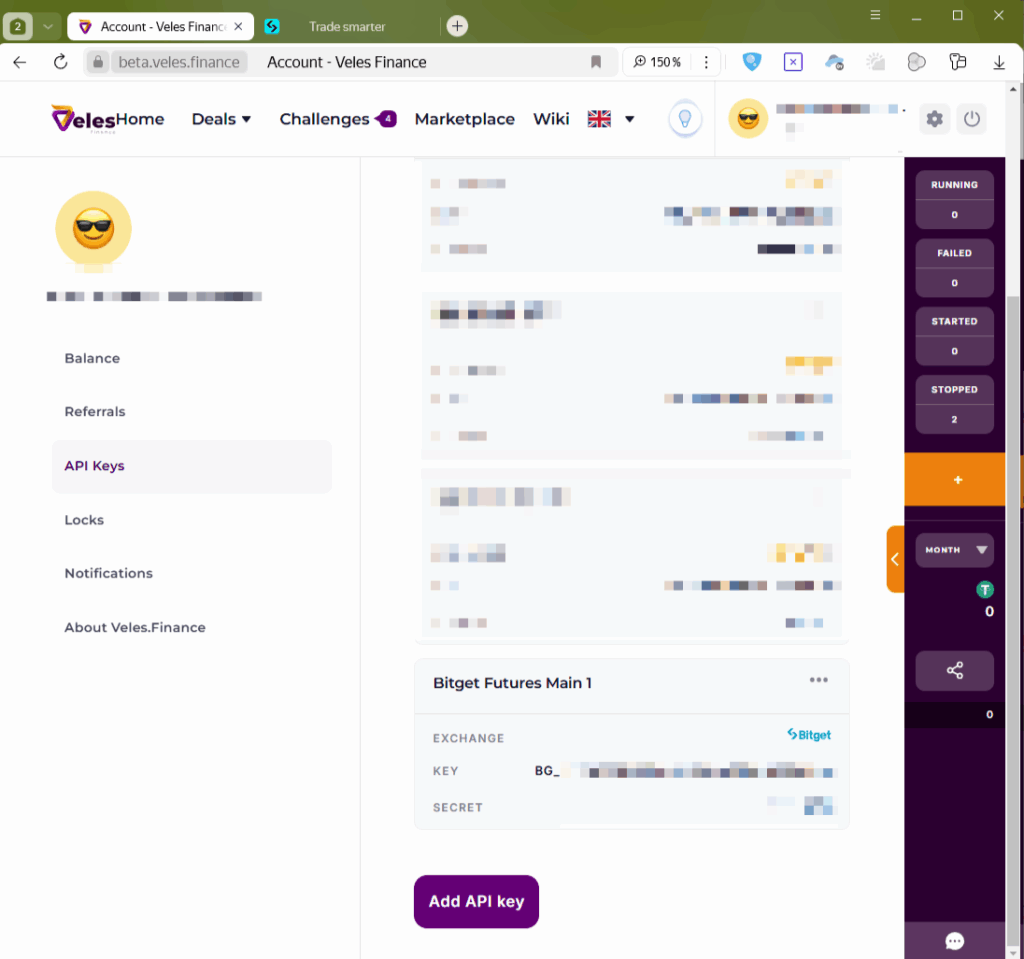
The basics of connecting Veles platform to exchanges via API keys are described in our article “What is API Key”:
https://help.veles.finance/en/what-is-api-key/
When the “Fast Connection” does not work, you may need to create an API key completely manually on the exchange, save its name and passwords, and then manually create a Binding in your Veles profile.
1. Log in to the exchange account and go to the profile in the “API Keys” section.
Click “+ Create API Key”.
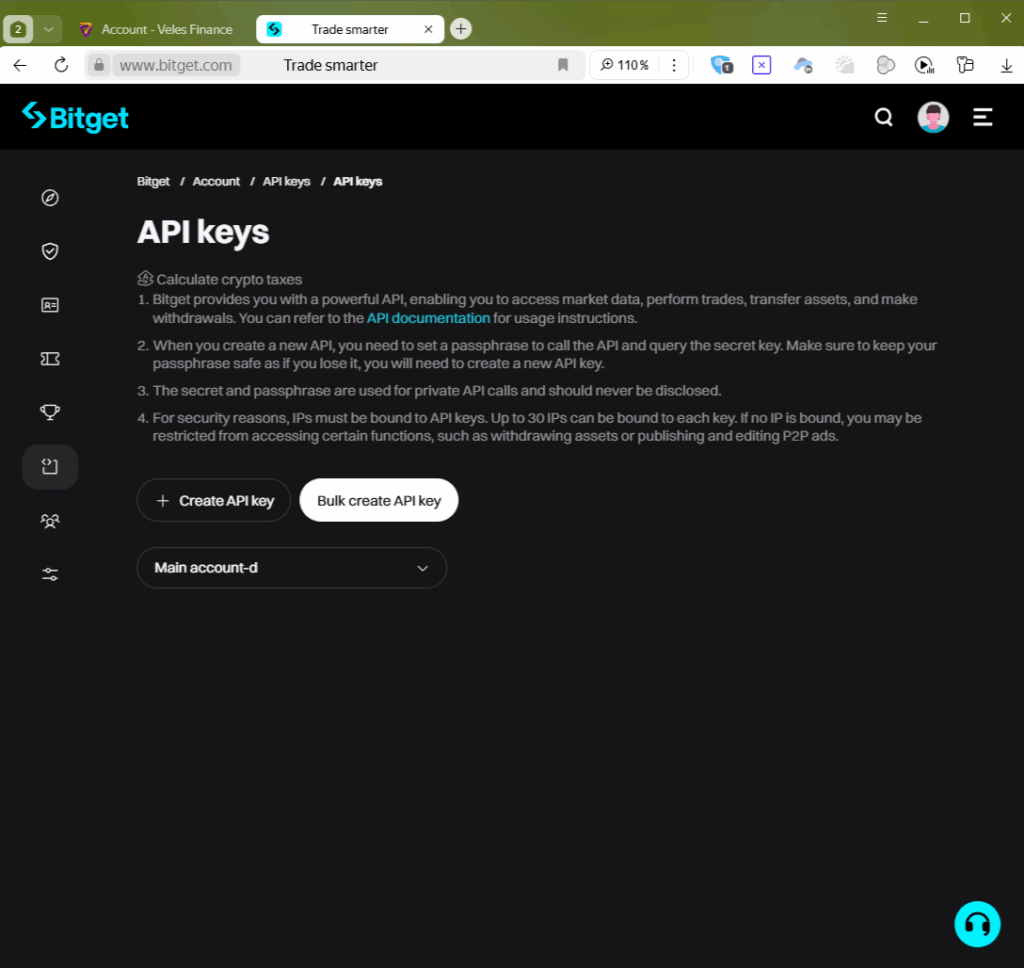
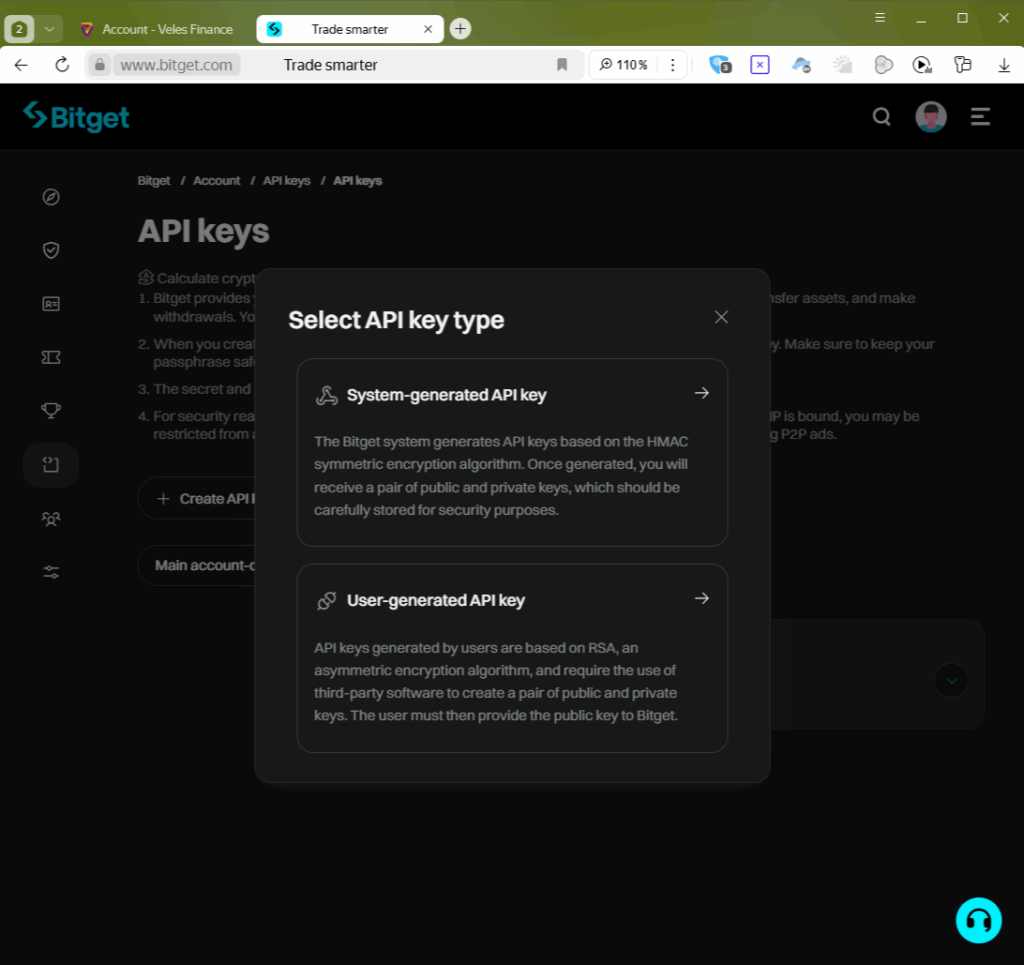
2. Select the “System-generated API Key” type
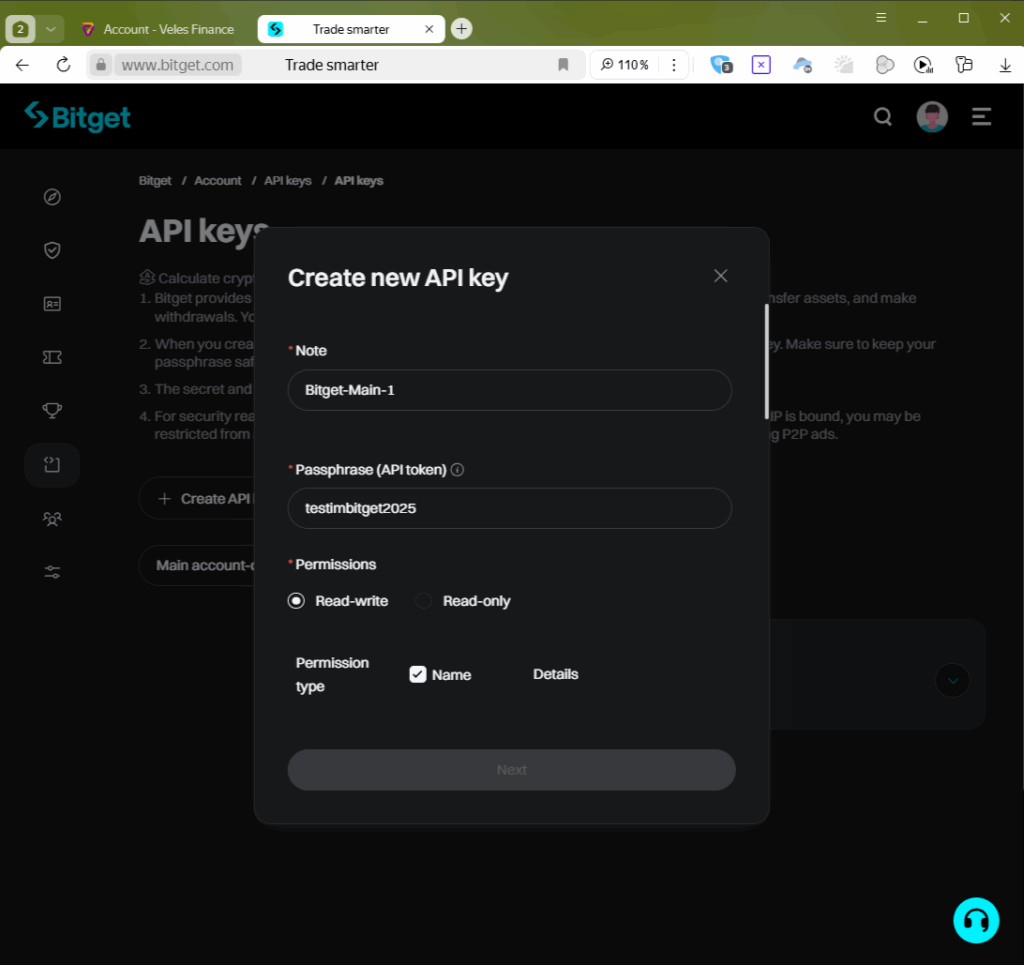
3. Fill in the parameters for the new key and save them in a safe place (in the password database).
- Set the key label in the “Note” field. It is used only on the exchange.
- Enter the passphrase for the key in the “Passphrase” field (the password can only include letters and numbers, special characters are not accepted).
- Check the “Read-Write” permission settings.
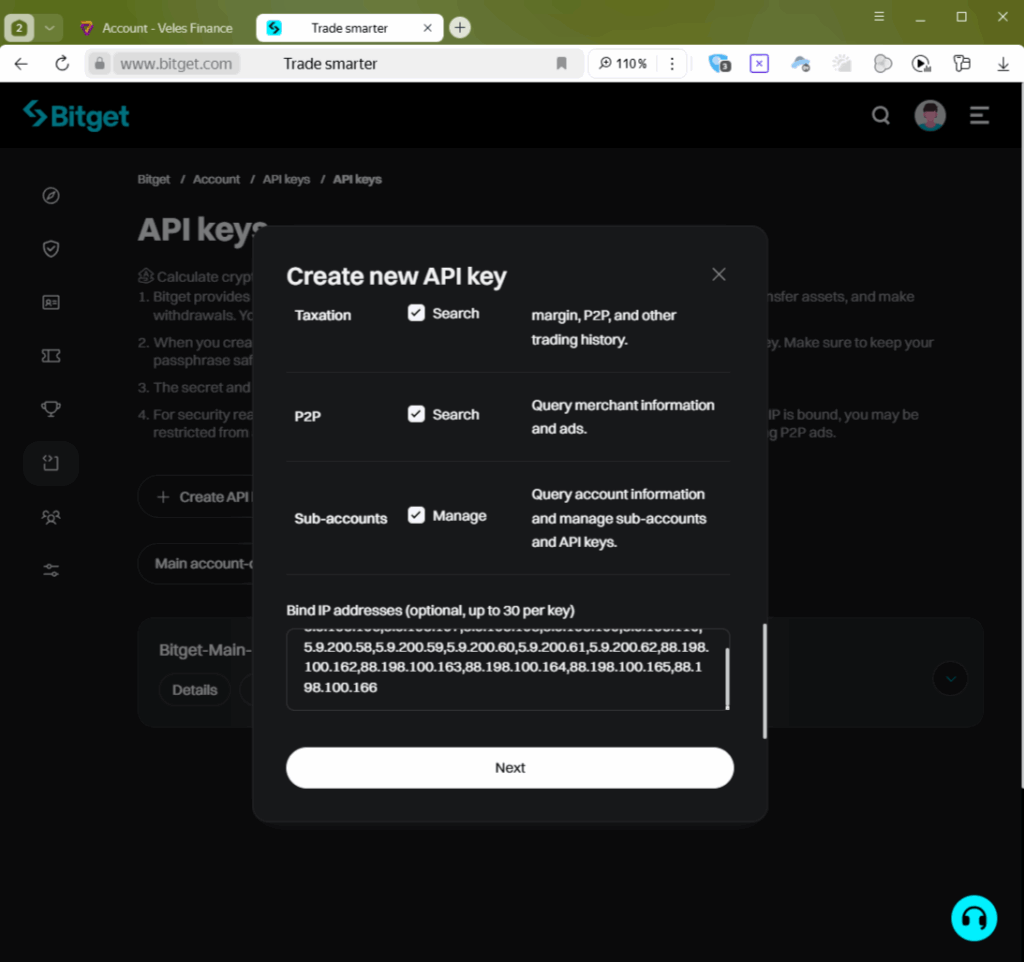
- Select Permission type “Name”, and all available permissions for this key will be selected.
Important! After that, scroll down this list and disable permissions for the funds transfer.
4. Then go down to the bottom of the window and specify a comma-separated list of IP addresses to copy from our page.
https://help.veles.finance/en/list-of-veles-ip-addresses-for-api-keys/
Then click “Next”.
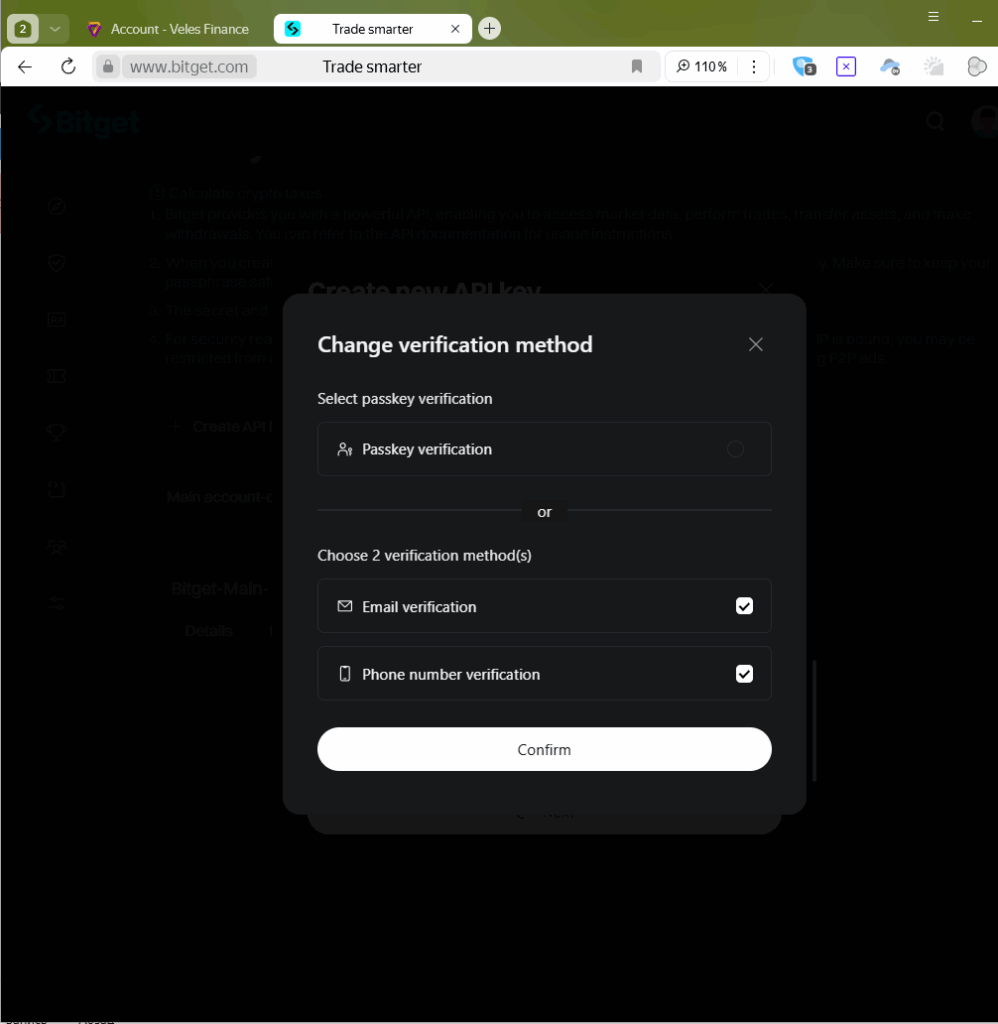
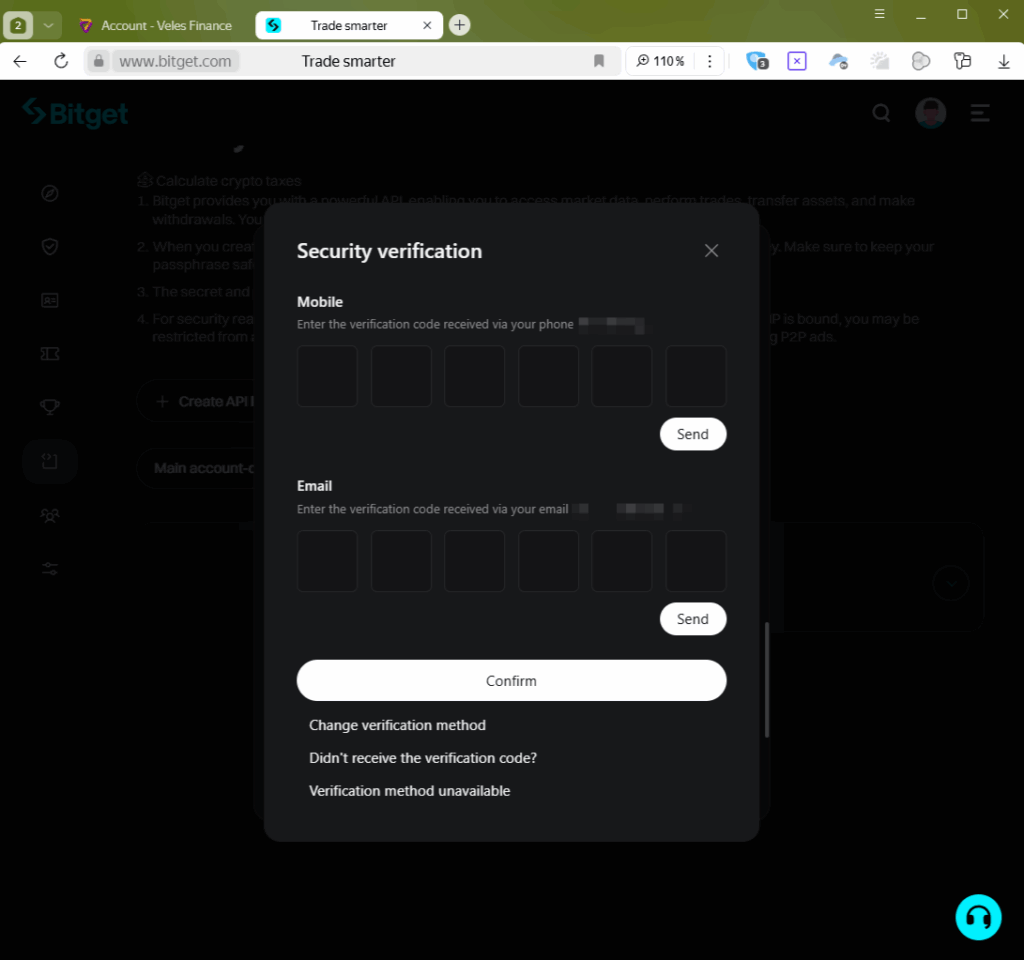
5. The exchange will require a security check. Either through a passkey or through a code to your phone + email (“Change verification method”). Select your option, enter the necessary information, and click “Confirm”.
.
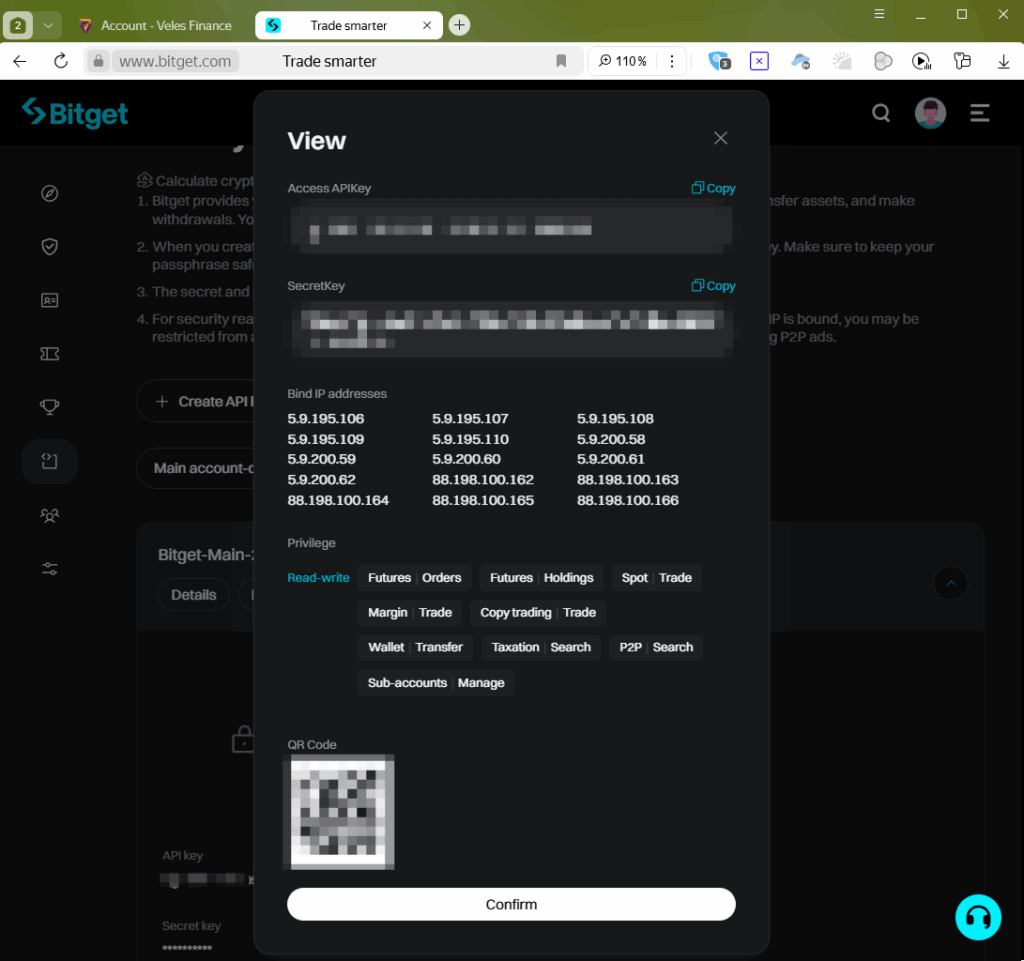
6. The exchange will display a window with the API key parameters. Copy and save them, and don’t close this window.
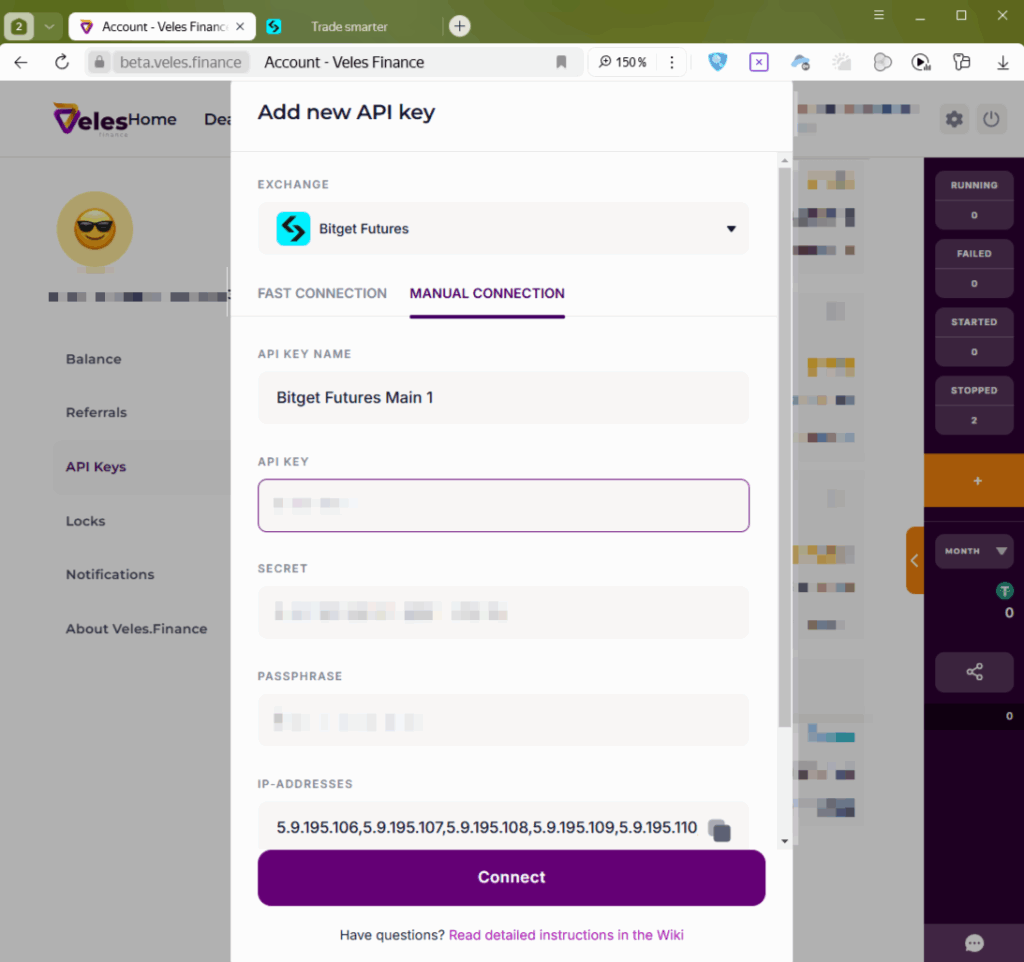
7. Go to the Veles personal account on the “API keys” page, click the “Add API key” button at the bottom of the screen.
In the dialog box, select “Bitget Futures” from the list of exchanges, and go to the “MANUAL CONNECTION” tab.
Transfer the data from the key from the exchange to the new Binding.
- API KEY NAME: specify an informative name for binding, for example “Bitget Futures Main 1”
- API KEY: specify the data from the “Access API Key” field generated by the exchange
- secret: specify the string from the “Secret Key” field generated by the exchange
- PASSPHRASE: specify the string “Passphrase” that you created earlier.
- IP-ADDRESSES: you don’t need to change anything in this field.
Click the “Connect” button.
8. The new binding “Bitget Futures Main 1” will appear in your profile in the list of all bindings, and you will be able to select it in bots to send them to trade on Bitget.
