
Widgets in the Terminal
Workspaces
Section titled “Workspaces”Terminal start in a clean “Home” workspace.
To proceed, select the API binding for the widgets and the desired trading pair.
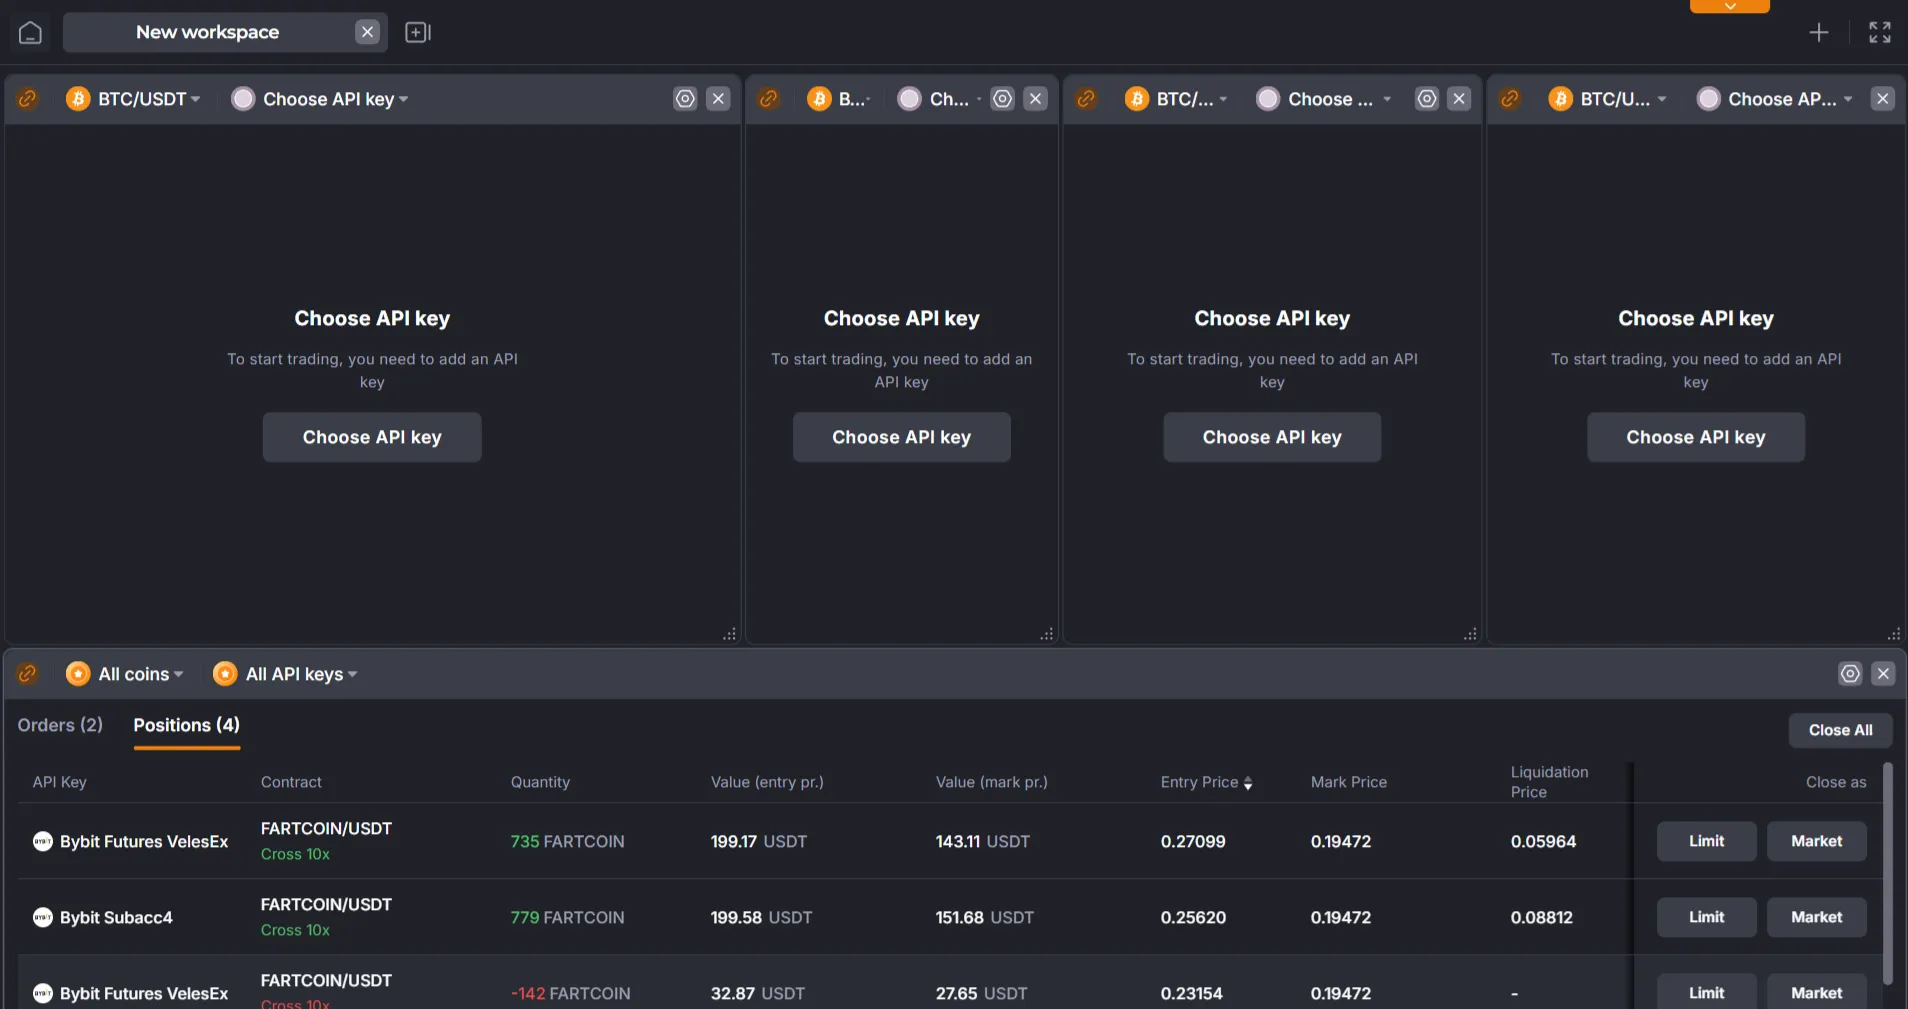
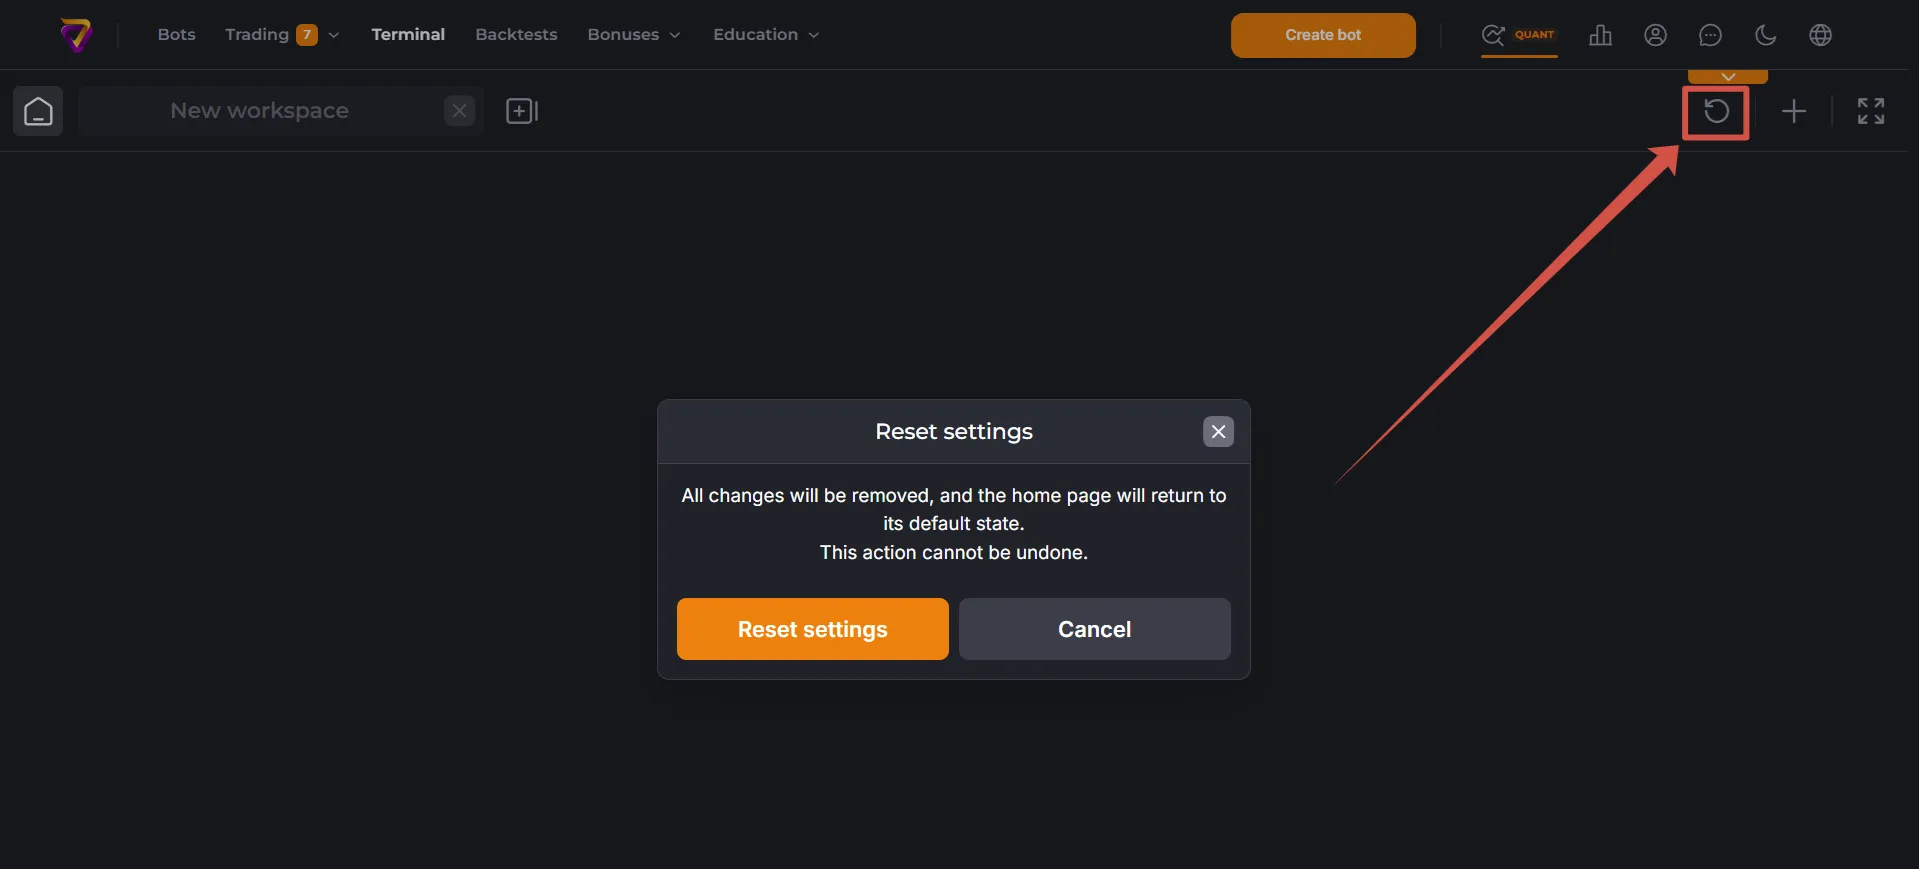
The “Home” workspace can be restored to its initial settings using the “Reset” button.
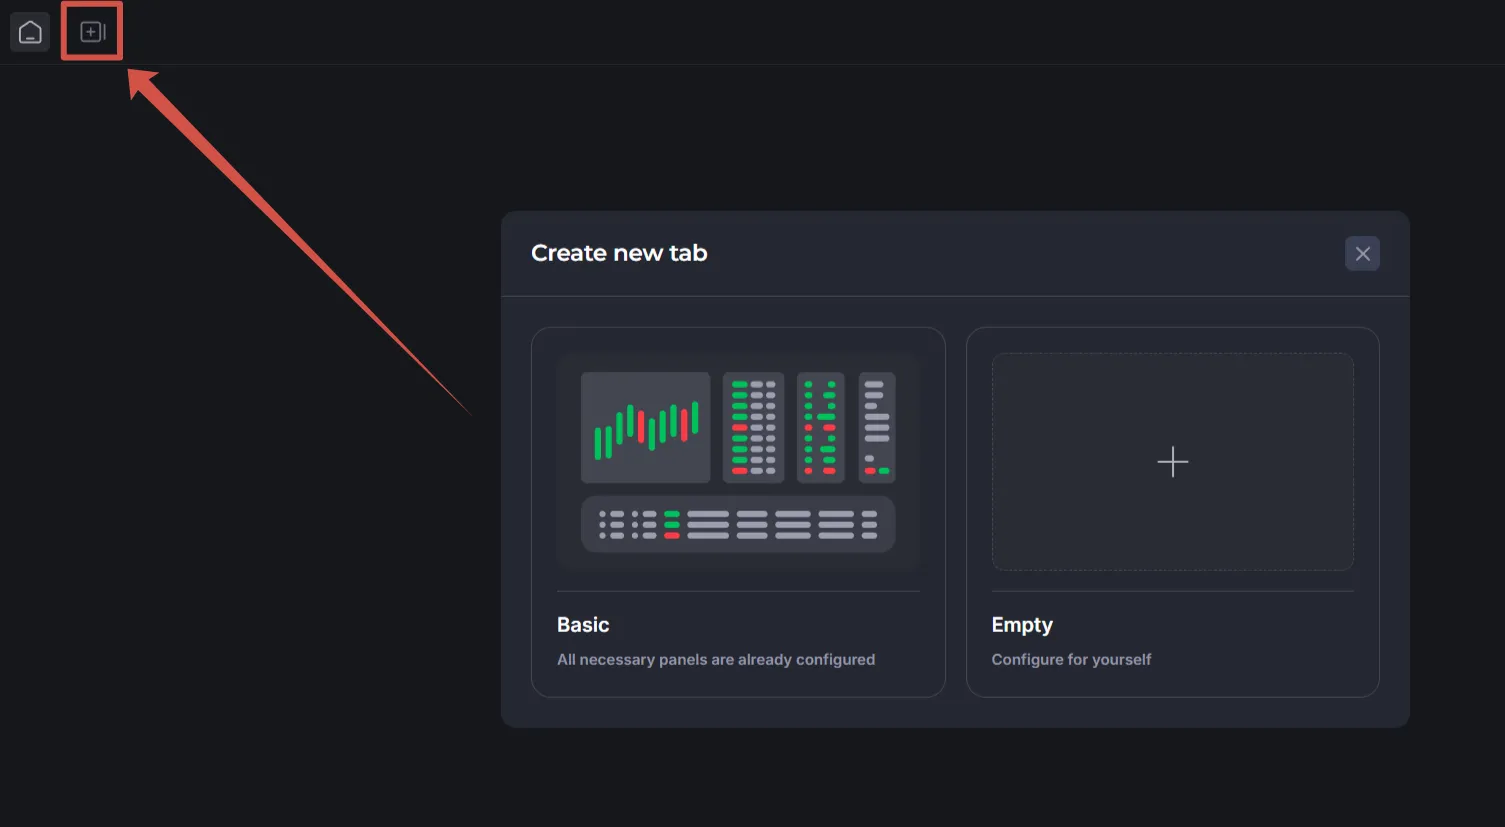
You can create an unlimited number of additional workspaces — each for a specific trading pair and API binding, for example.
When creating a new workspace, you can select a template or an empty workspace.
To rename a workspace, double-click its title.
Widget Binding
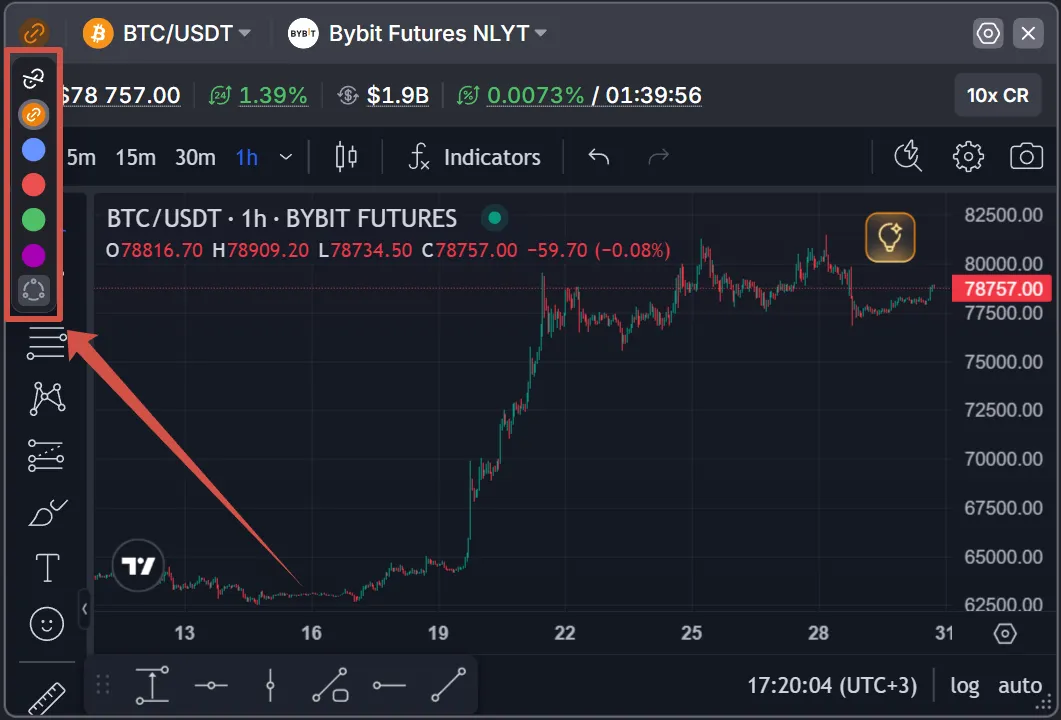
Section titled “Widget Binding”Widgets in a workspace can be independent or binded together. Binded widgets share the same API Binding and trading pair, and can be switched between the entire group based on these parameters.
You can create up to 5 binding groups in a workspace, each color-coded.
The “ring” option binds all widgets in the current workspace.
Widget Types
Section titled “Widget Types”You can add up to 5 types of widgets to your workspace; widgets of the same type can be added multiple times.
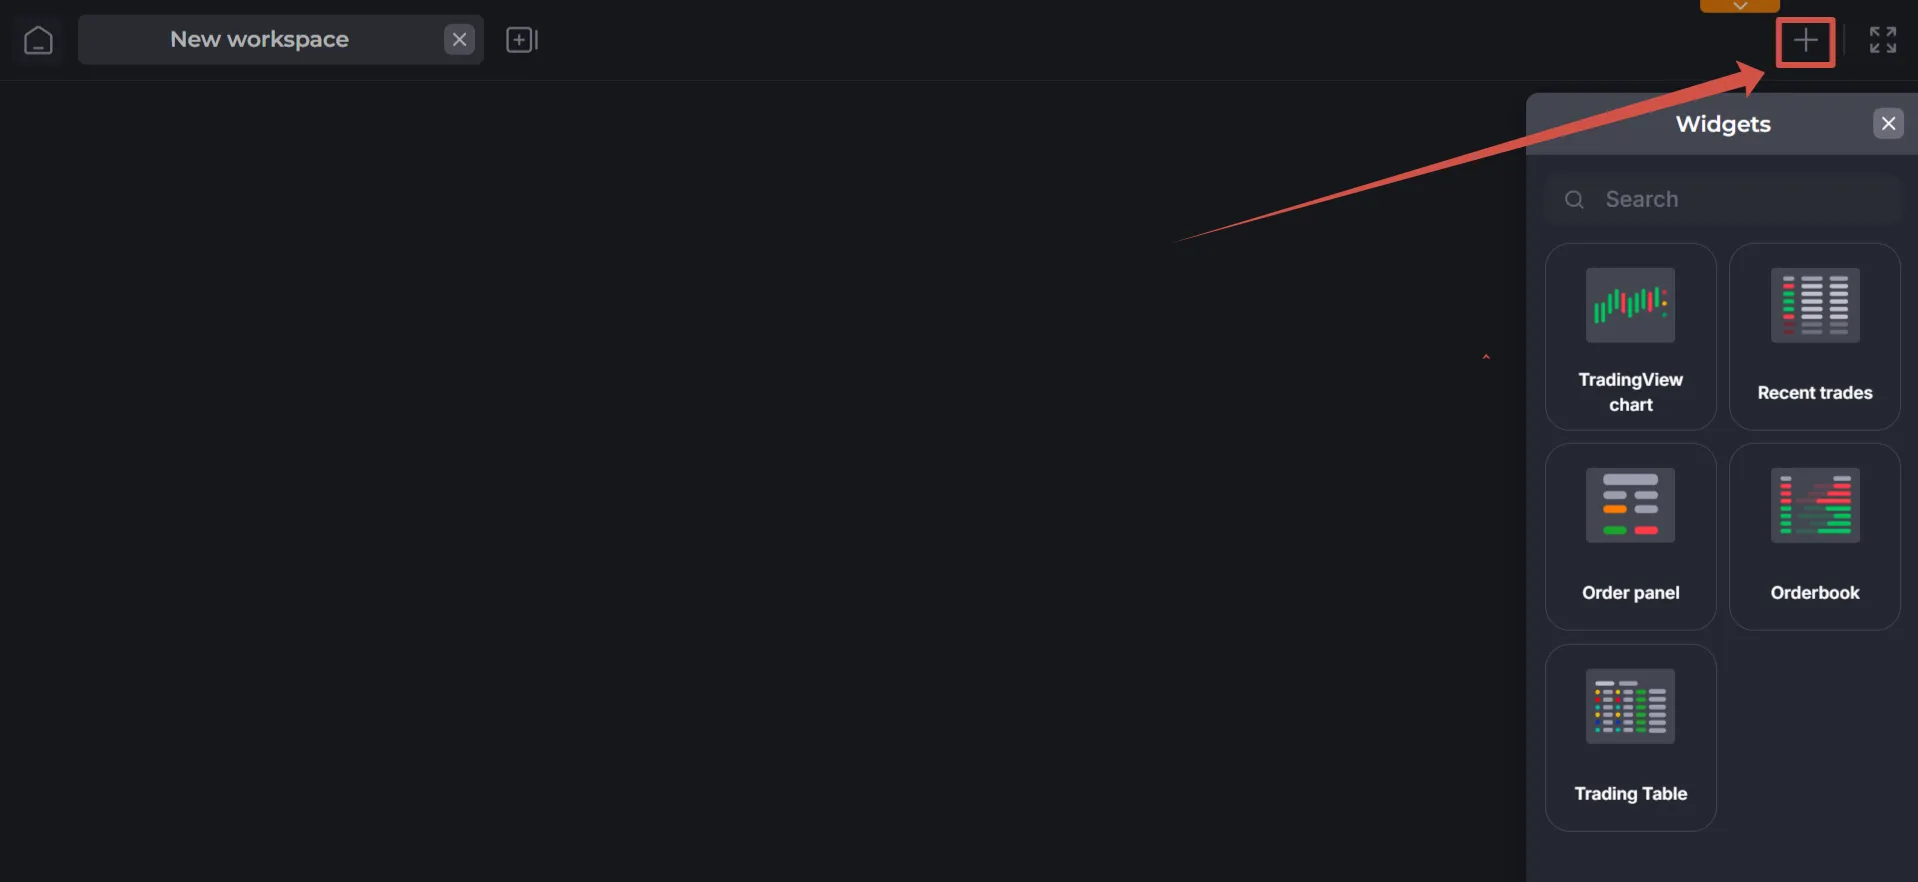
After adding, resize the widget so all its elements are visible (drag the lower right corner).
To configure the widget, click the gear icon in its upper right corner.
TradingView Chart
Section titled “TradingView Chart”The chart displays real-time price data, and you can overlay technical analysis indicators and use auxiliary tools.
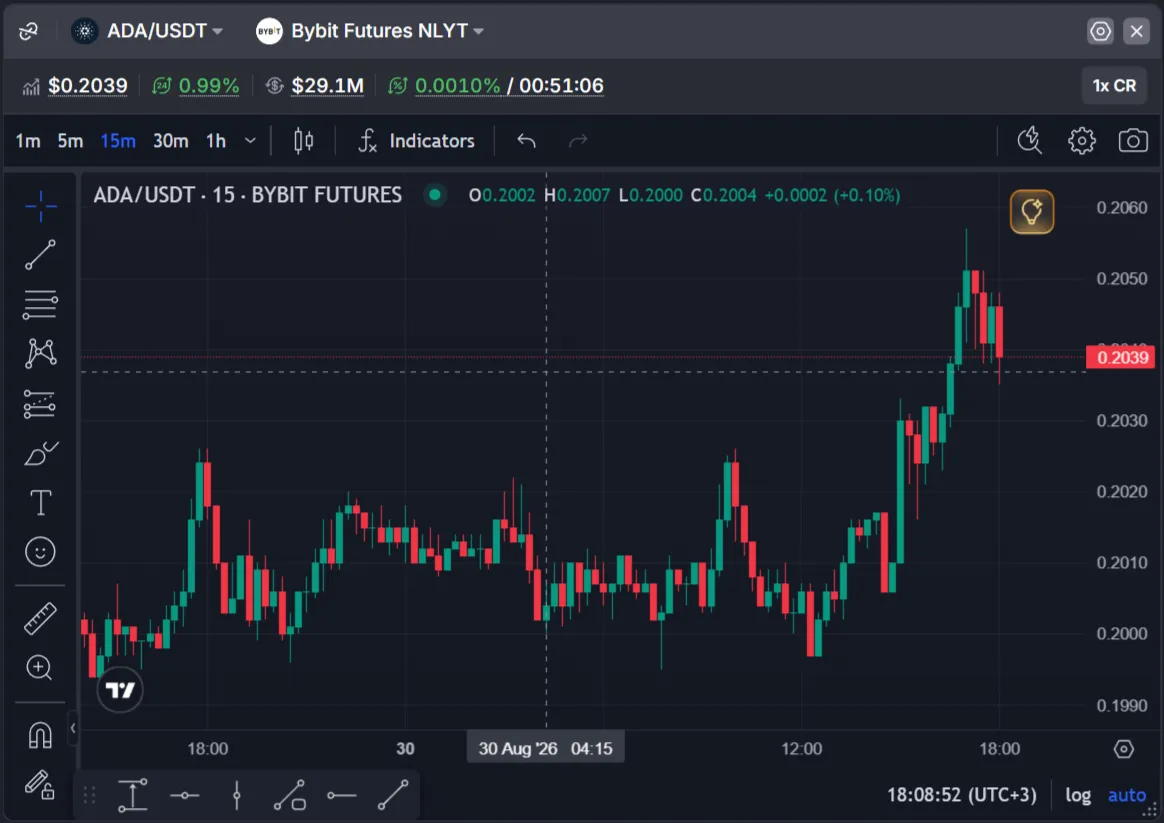
Select the API binding and the desired trading pair, if necessary.
Features:
- You can view data for a trading pair:

-
Market price,
-
24-hour price change,
-
24-hour trading volume,
-
Funding rate.
-
You can customize the margin type and leverage.
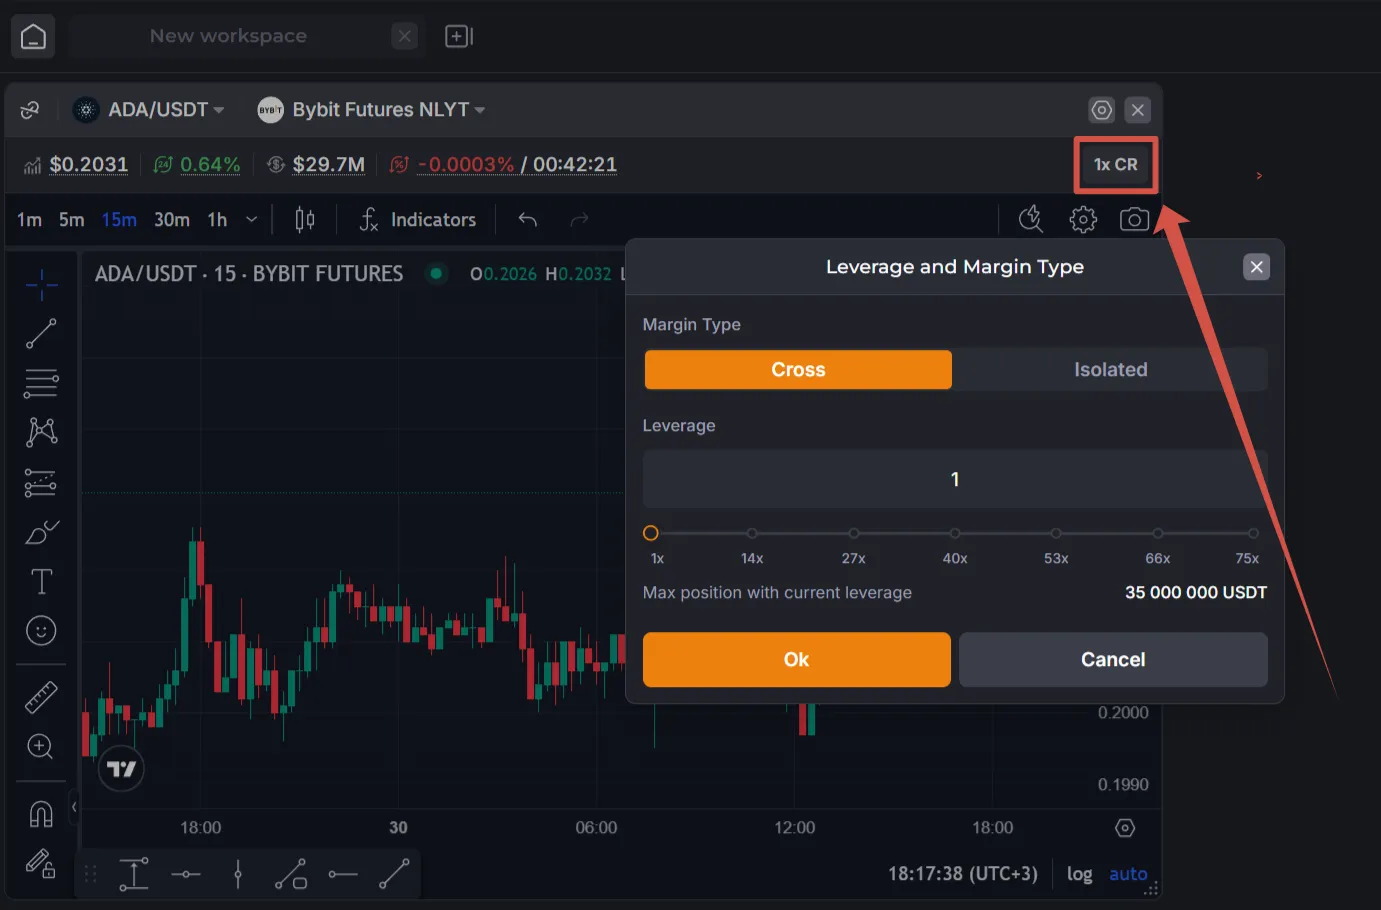
- The margin type can be changed for the entire trading account. Switching occurs immediately when you select the button.
Caution! When switching the margin type, the liquidation prices of existing positions may become too close and trigger a trade!
- You can edit the leverage and click Ok. The maximum position size for the selected leverage is also displayed.
-
You can open orders directly on the chart – limit and stop-market. Use the ”+” pop-up button on the price scale, enter the order volume, then select the order type and direction from the drop-down menu.
-
You can edit limit orders on the chart (change the price and volume).
-
You can quickly select a trading indicator (click the “light bulb” button). This selection performs a quick profitability analysis for a single-order bot using all available indicators and displays the indicators that win in this comparison.
Settings (by clicking the gear button):
- Control the display of orders and positions,
- Configure confirmations for actions with orders and positions in the widget.
Recent Trades
Section titled “Recent Trades”Historical data on completed trades.
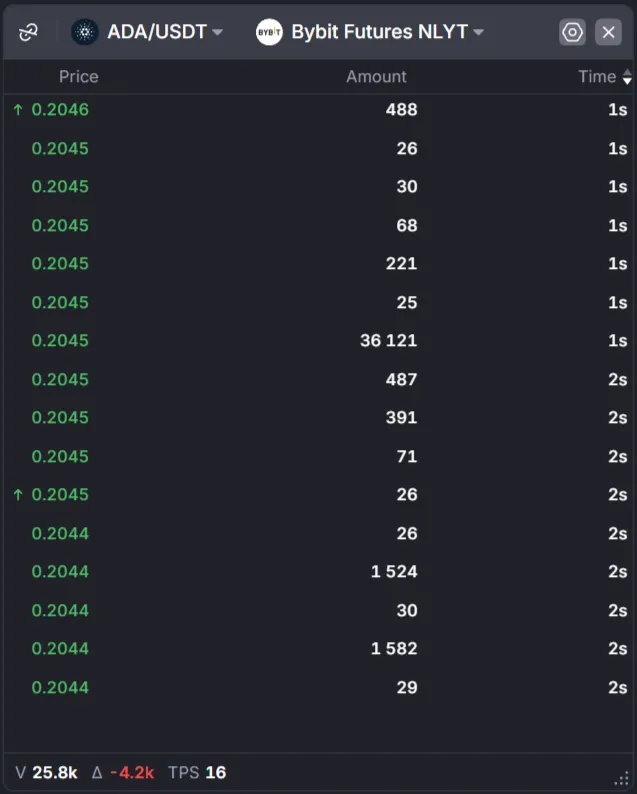
Select the API binding and the desired trading pair, if necessary.
Settings (by clicking the “gear” button):
- Expiration time
- Refresh interval
- Quantity truncation (thousands are replaced with K)
- Quantity display in USDT (default: in coin)
Order Book (DOM)
Section titled “Order Book (DOM)”The Order Book is a list of all open buy and sell limit orders. It can be used to assess the supply/demand for a traded asset, liquidity, and support/resistance levels in real time. Red seller orders (“Ask”) are listed at the top, green buyer orders (“Bid”) at the bottom, and a volume histogram is shown.
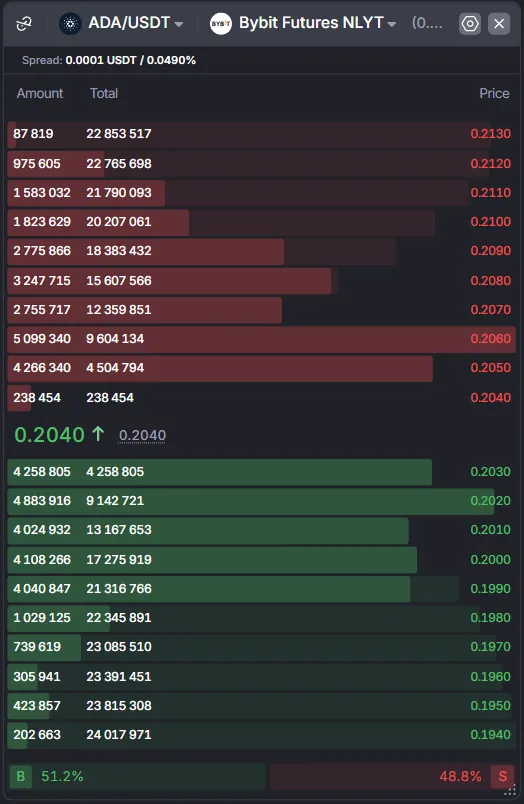
Select the API binding and the desired trading pair, if necessary.
Settings (by clicking the “gear” button):
- Display type
- Font size
- Price grouping
- Abbreviation of quantity values (thousands are replaced with K)
- Display quantity in USDT (default: in coin)
Trading Panel (Order Creation)
Section titled “Trading Panel (Order Creation)”This panel is used to place market and limit orders by manual trading.
Important! If a bot is already trading on a trading pair, manually added orders will corrupt its trade, if they get executed.
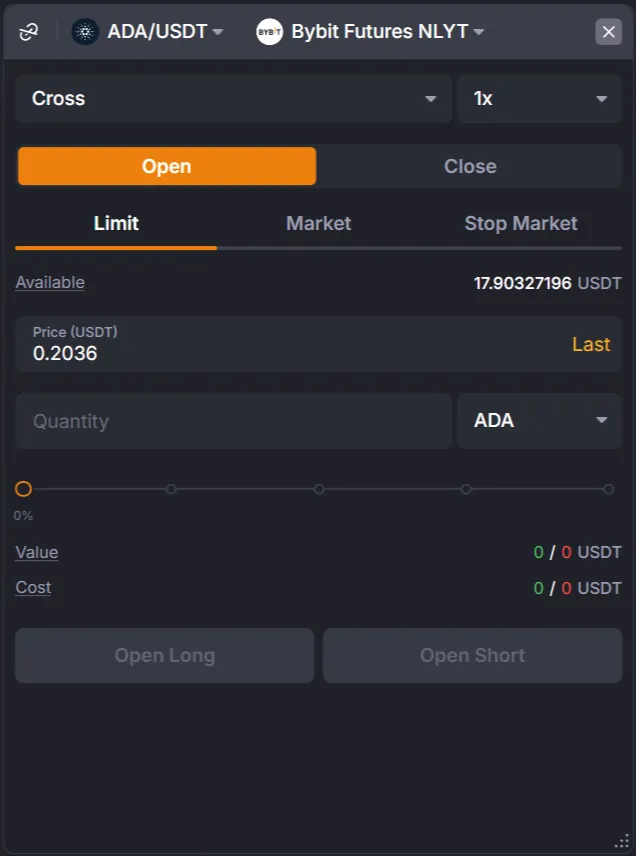
Select the API binding and the desired trading pair, if necessary.
To create an order:
- Select the margin type and leverage.
Caution! When switching the margin type, the liquidation prices of existing positions may become too close and trigger a trade!
- Select the action – “Open” or “Close.”
- Select the order type – limit or market.
- Specify the order parameters – price and quantity.
- Select the algorithm – “Long” or “Short” (according to the selected action).
- In the dialog box, confirm the order creation.
Trading Table (Open Positions, Active Orders)
Section titled “Trading Table (Open Positions, Active Orders)”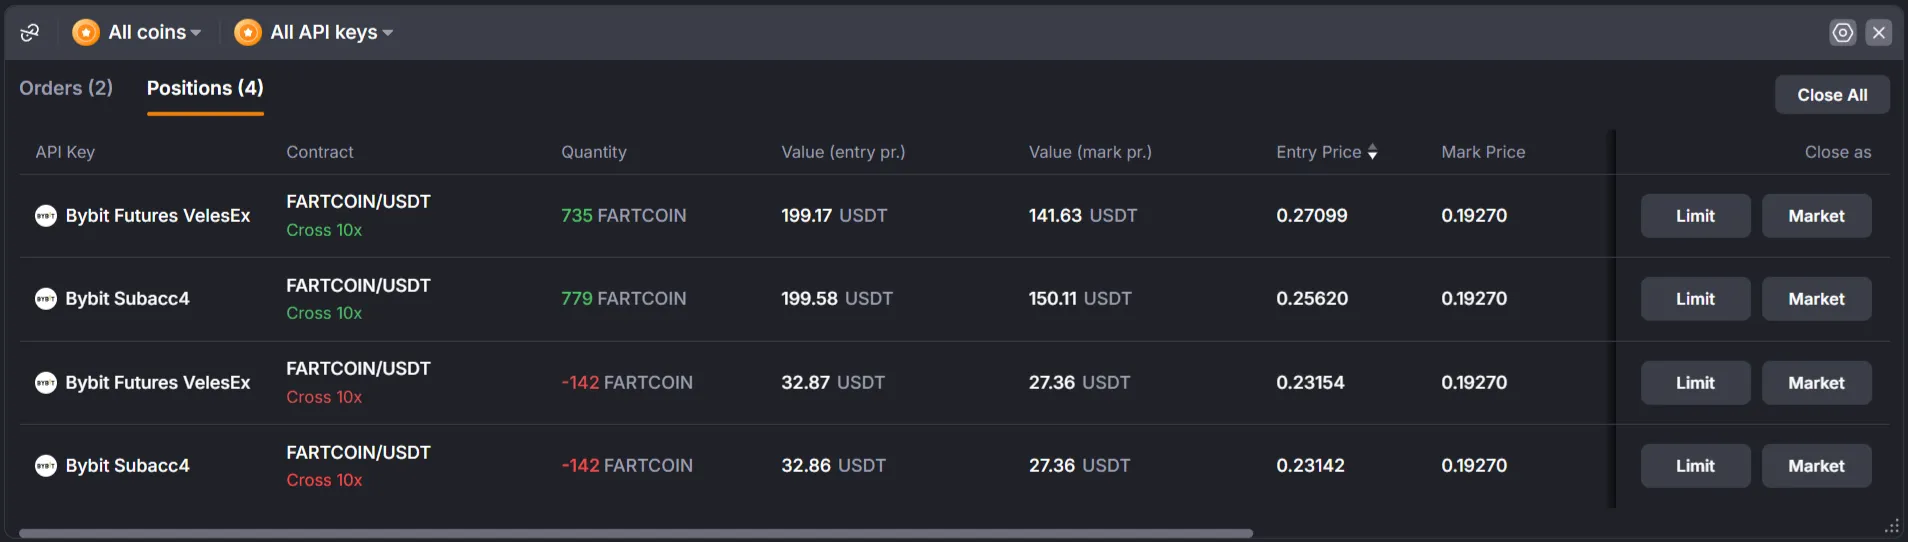
Select the API binding and the desired trading pair. You can also select “All Coins” to see all positions and orders on the trading account for this API Binding.
The widget is detached from other widgets by selecting “All Coins” in the drop-down list of instruments.
Settings (by clicking the “gear” button):
- Show/hide and order columns in tables.
- Confirm actions in the widget.